I am introducing a new category for Everything Beautiful E311 called Little Lessons. These posts are about something you can do that is quick and easy and fun! Confession: most of the time, Little Lessons will be posted when I really should write an in-depth, awe-inspiring, soul-searching and thought-provoking missive, but I just don’t have the time or motivation to dedicate to such an endeavor.
In other words, Little Lessons will likely make frequent appearances. 
Movie Night Gift Baskets
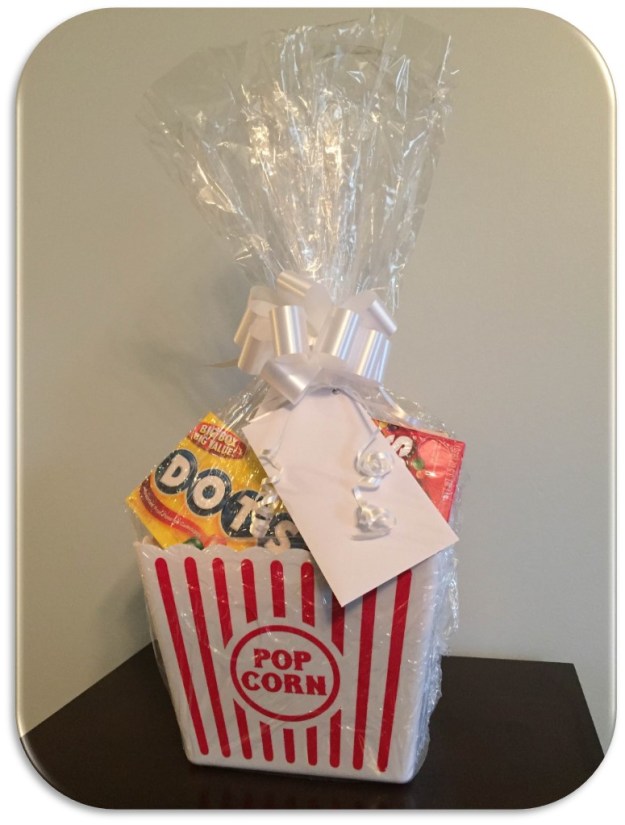
This project is simple and cost effective, and almost always appreciated! Most of the items you need to make this same basket may be found at Dollar Tree. I included a popcorn tub, decorative shredded paper, microwave popcorn, hot chocolate mix, and a variety of theater-type candy boxes, along with the shrink-wrap bag. Everything except for the hot chocolate came from Dollar Tree, which I would have purchased there but all of the boxes were crushed or bent, and that doesn’t make for a great gift presentation.
Total cost for this gift = $11 + gift card amount!

Here the steps. From start to finish, it took me five minutes to assemble each gift box (minus the last one, since I was photographing the steps for you – not an easy feat since I only have two hands and an iPhone).
Step one: Filler. I added a crumbled sheet of brown packing paper I had on hand for a fuller look, along with two bags of the decorative paper shreds. You can use more or less to get the look you want.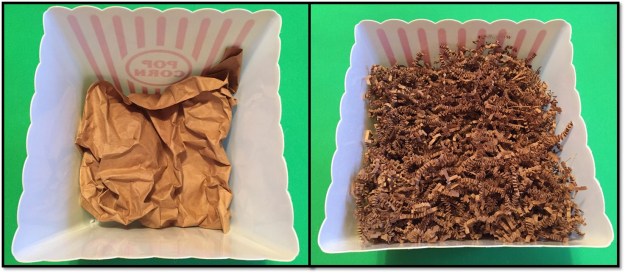
Step two: Stuff. Arrange the items in the popcorn tub. I like to be sure that the recipient can see everything in the tub at once. This requires layering and stacking, placing items at angles and differing heights.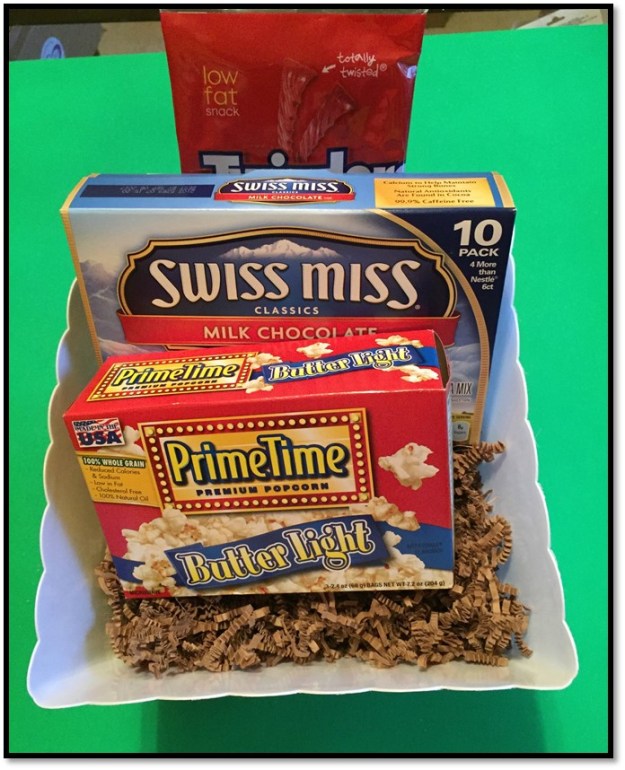 OOPS!!!
(I just realized that I bought a box of “light” popcorn! I hope they don’t mind…)
Step three: Nest. The shrink wrap bag comes folded neatly and usually is rather stiff. Open up the bag and then crush it down into a nest shape. It is much easier to place the box inside this way rather than trying to slide the box down into the bag without dumping the contents.
Step four: Bag. Straighten the sides of the bag and make sure the box is centered, then gather the top of the bag just above the contents, using your non-dominant hand.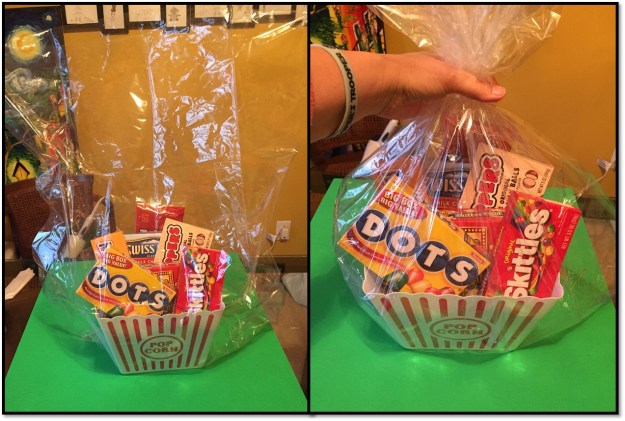
Step five: Shrink. In our house, there is one hair dryer and one curling iron, and both of them are kept in the studio/craft/room/music room. This is about the only place they are ever used, and only for crafting. Holding loosely onto the bag (because the air has to get out somewhere, and if you hold too tight, the bag won’t shrink due to the trapped air), use the hair dryer set on medium-high to high depending on your dryer. Move the dryer slowly back and forth across the shrink-wrap bag. As the bag heats up, the plastic will begin to tighten. Do one side at a time, paying attention to the corners of the pieces inside the bag. Let the plastic shrink around the corners of these items so that they will not easily shift when moving the completed bag.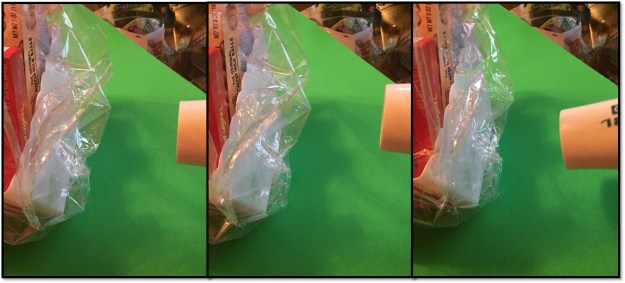
Step six: Bow. In the shrink-wrap kit that I purchased, a pull-type bow was included. You can use this bow or you can tie the bag with your preferred method. Leave longer strings attached for the next step.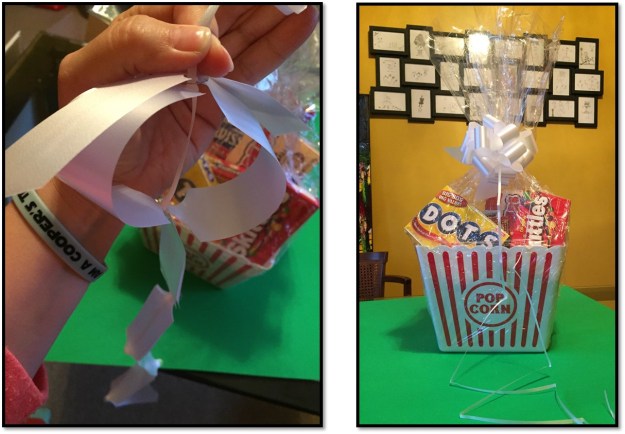
Step seven: Card. I highly suggest giving a gift card for a movie rental unless you have included a movie DVD inside the gift bag. Place the gift card inside an envelope. Using a hole-punch, place a hole in the top left hand corner of the envelope. Pull the long string that is attached to the gift bag through the hole and tie. Either curl or trim the ends of the string.

Step eight: Give. Your movie night gift bag is finished and ready for the lucky recipient of your choosing!


 Yes, I do have brushing my teeth listed as a task! Some days, it is a great accomplishment to even get that part of my list completed, and being able to check even one item off is a great mental boost. I also have eating breakfast on the list, because I tend to forget to eat breakfast, and I have to eat before I take my medications, so if I don’t eat, I don’t take my meds. Bad deal.